


Application settings
Configure the application-wide settings of Bonita Process Designer: self-registration, autosave timing, AI prompt length, product analytics, and the AI configuration with its provider API keys, and find the Installation ID.
Application settings are global options that apply to your whole Bonita Process Designer instance. They control whether visitors can register their own account, which role those accounts get, how often diagrams autosave, how long AI generation prompts may be, whether product analytics is sent, and which AI provider keys the installation uses.
|
Only users with the Admin role can view and change application settings. Other users never see these options. |
Where to set them
Open the Admin panel and select the Settings tab. The page has four sections: User Registration, Editor Settings, Product Analytics and AI Configuration.
There is no Save button: each setting is saved as soon as you change it, and a confirmation message appears. Updated values take effect immediately for new actions (for example, the next autosave or the next AI generation request).
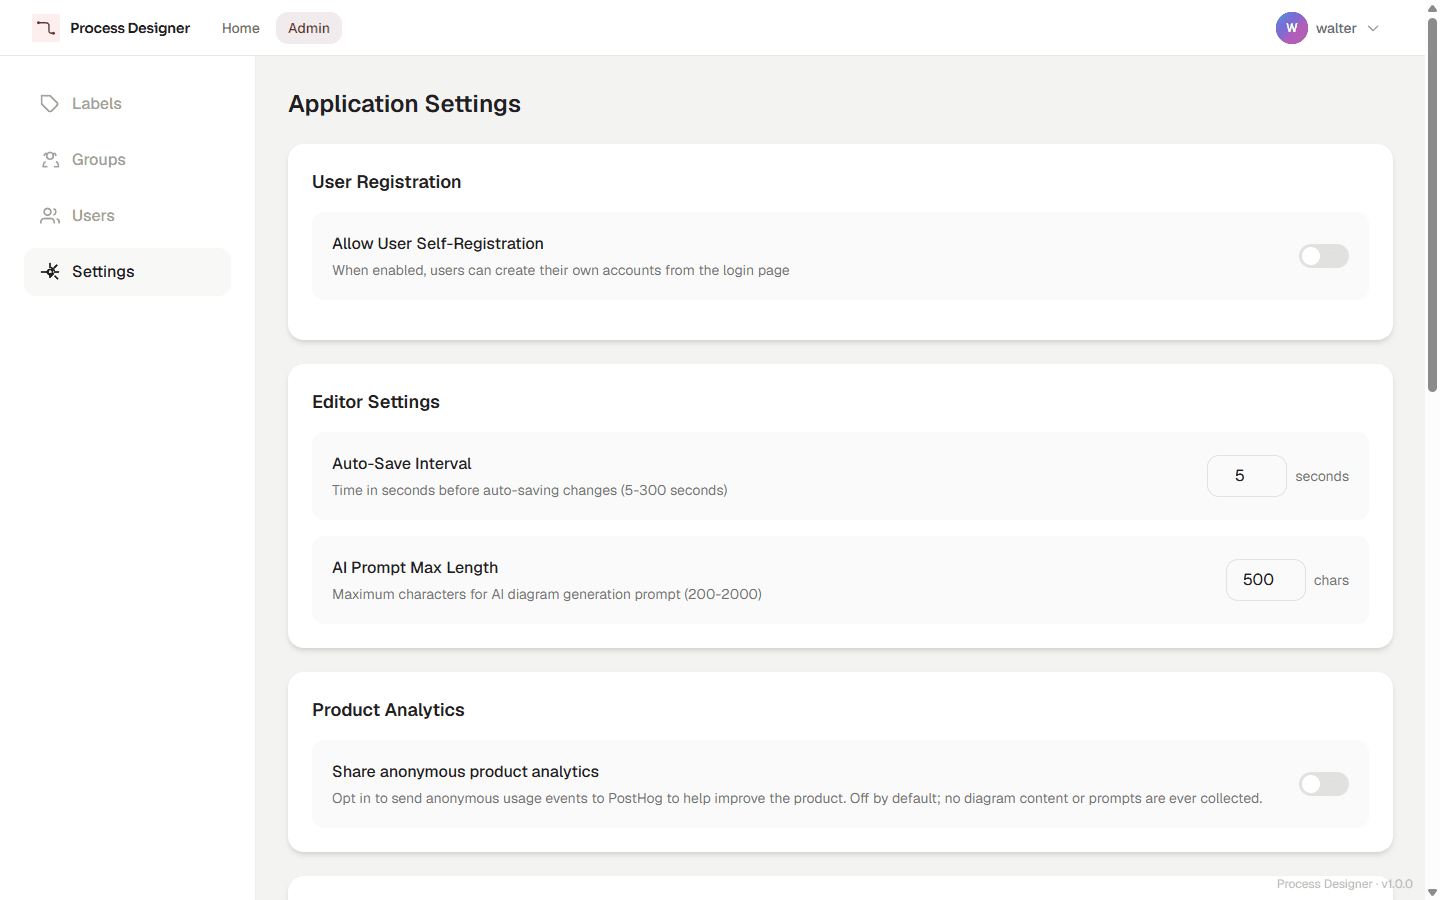
User registration and editor settings
| Setting | Type | Range | Default | Description |
|---|---|---|---|---|
Allow User Self-Registration |
Boolean |
On / Off |
Off |
When enabled, a registration link appears on the login page so visitors can create their own account. When disabled, only an Admin can create accounts. See Manage users. |
Default Role for New Users |
Choice |
|
|
The role assigned to accounts created through self-registration. Choose |
Auto-Save Interval |
Number (seconds) |
5–300 |
5 |
How often the editor automatically saves the open diagram while you work. A lower value saves more frequently; a higher value reduces background saves. |
AI Prompt Max Length |
Number (characters) |
200–2000 |
500 |
The maximum number of characters allowed in a natural-language description used for AI diagram generation. |
If you type a number outside the allowed range, the field is set to the nearest limit, and that value is saved. For example, 2 in Auto-Save Interval becomes 5. An empty field, or a value that is not a number, becomes the minimum.
|
The Default Role for New Users never grants Admin rights. New self-registered users can only be a |
Product analytics
The Product Analytics section has a single toggle, which is off by default. When you turn it on, a dialog shows the consent clause: tick the acknowledgment box and select Enable analytics. To turn it off, confirm with Disable analytics. The section shows when the setting was last changed, and by whom.
The setting is recorded with the AI service as well as in your installation. You can therefore change it only once the installation is registered, and while the AI service can be reached: if the AI service does not confirm the change, the setting stays as it was.
AI configuration
The AI Configuration section shows the identity of your installation and the AI provider keys that enable AI generation.
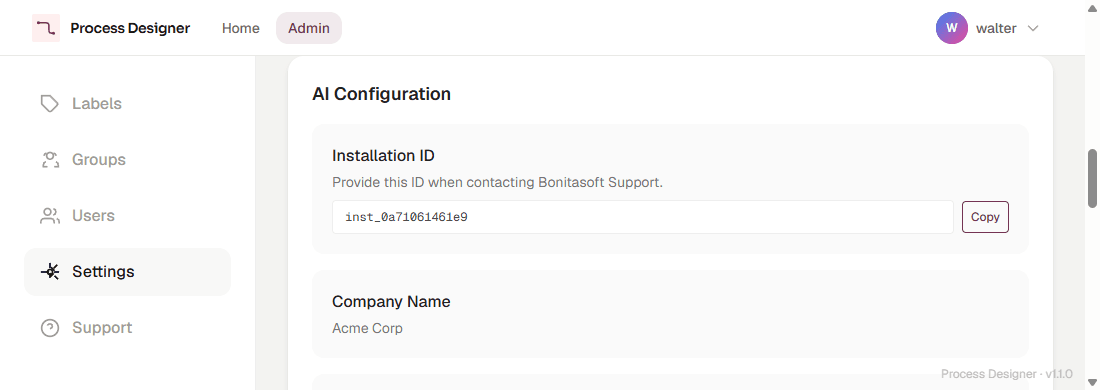
Installation ID
The Installation ID identifies your instance to the Support team. It is assigned when the installation is registered. Select Copy to copy it, and paste it into your support request. See Get support.
If the installation is not registered yet, the row shows Not registered yet. If the ID cannot be read, it shows Unavailable. In both cases Copy stays disabled.
Installation details and AI status
The section also shows the Company Name recorded at registration, a link to the Privacy Policy, and the AI Generation Status: Enabled when AI generation is available, Disabled otherwise. The company name is the name entered at registration, followed by the customer name of the license when a license was already installed.
If the installation is not registered, the section shows the Installation ID row with Not registered yet, and a message asking you to log out and log in again to complete the registration. The other rows are hidden until then.
AI provider API keys
AI generation uses your own API key with one of the supported providers: OpenAI, Anthropic or Gemini. Configure a key for at least one of them — any configured key enables AI. Each provider has its own row, with a Configured or Not configured badge.
-
Tick the consent box of the AI prompt retention clause, under the key rows. The buttons that save a key stay disabled until you do.
-
Paste the key in the provider’s field.
-
Select Save API key, the disk button of the row. Before sending the key, the page checks its start: an OpenAI key starts with
sk-, an Anthropic key withsk-ant-, a Gemini key withAIza.
The key is stored by the AI service, outside your installation, which uses it to call the provider. Process Designer itself only records that a key is configured.
To remove a key, select Remove API key on its row and confirm with Remove Key. When no key is left, users can no longer generate diagrams with AI.
AI prompt retention
The AI prompt retention clause is the consent to let the AI service store the prompts and the generated diagrams. Once it is given, the section shows AI prompt retention consent given., with the date of the change and the Admin who made it.
Select Revoke consent to withdraw it. Revoking disables AI generation for the whole installation, but does not delete the API keys held by the AI service. To enable AI again, tick the consent box, paste a provider key again, and save it: Process Designer does not hold the key, so it cannot re-enter it for you.
Related settings
These options live in their own administration screens rather than in Settings:
-
Manage AI quota — the per-group limit on AI generations over a rolling 30-day window.
-
Manage the license — activate or renew your Bonita Process Designer license.
-
Download a diagnostic archive — the Support tab.
For settings that operators configure outside the application (database connection, ports, CORS, TLS, proxy), see Configuration reference.