


Manage users
Create, update, and remove Bonita Process Designer user accounts, assign roles, reset passwords, and control how users access the application.
User management is an Admin-only task. From the Users tab of the admin panel, you create accounts, assign each user a role, reset passwords, and delete users. Every authenticated user can also edit their own profile. For how roles map to permissions, see Roles and permissions.
|
The application always keeps a default administrator account so that a fresh installation can be configured. See First-time setup for the initial admin credentials and the forced first-login password change. |
Open the user list
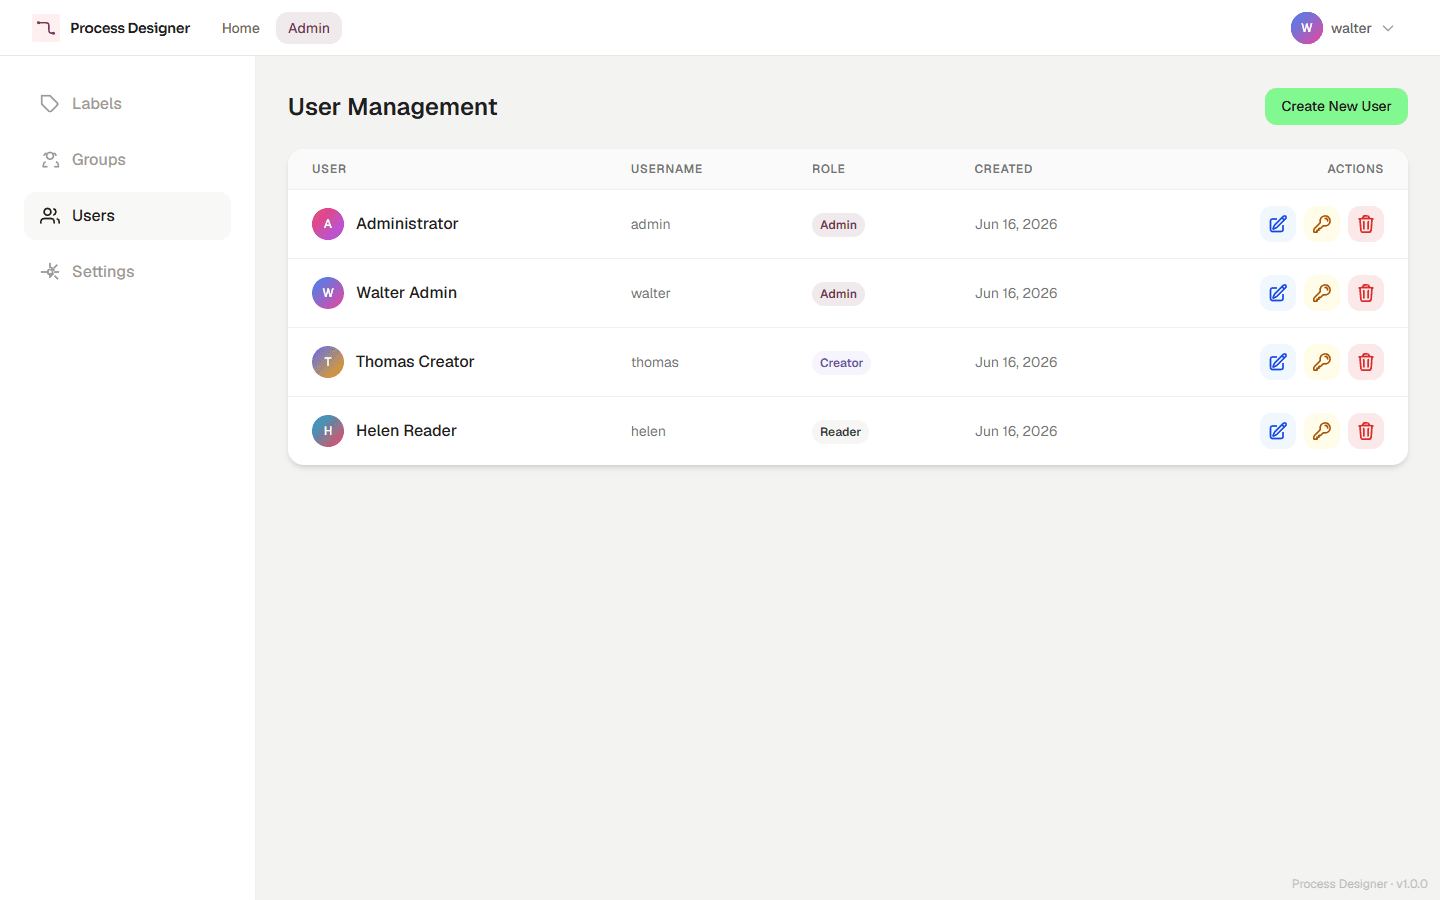
As an Admin, open the admin panel and select Users. The User Management table has five columns:
-
User — the user’s avatar and full name;
-
Username — the login identifier;
-
Role —
Reader,CreatororAdmin; -
Created — the date the account was created;
-
Actions — three buttons: Edit user, Reset password and Delete user.
Create a user
-
In the Users tab, select Create New User.
-
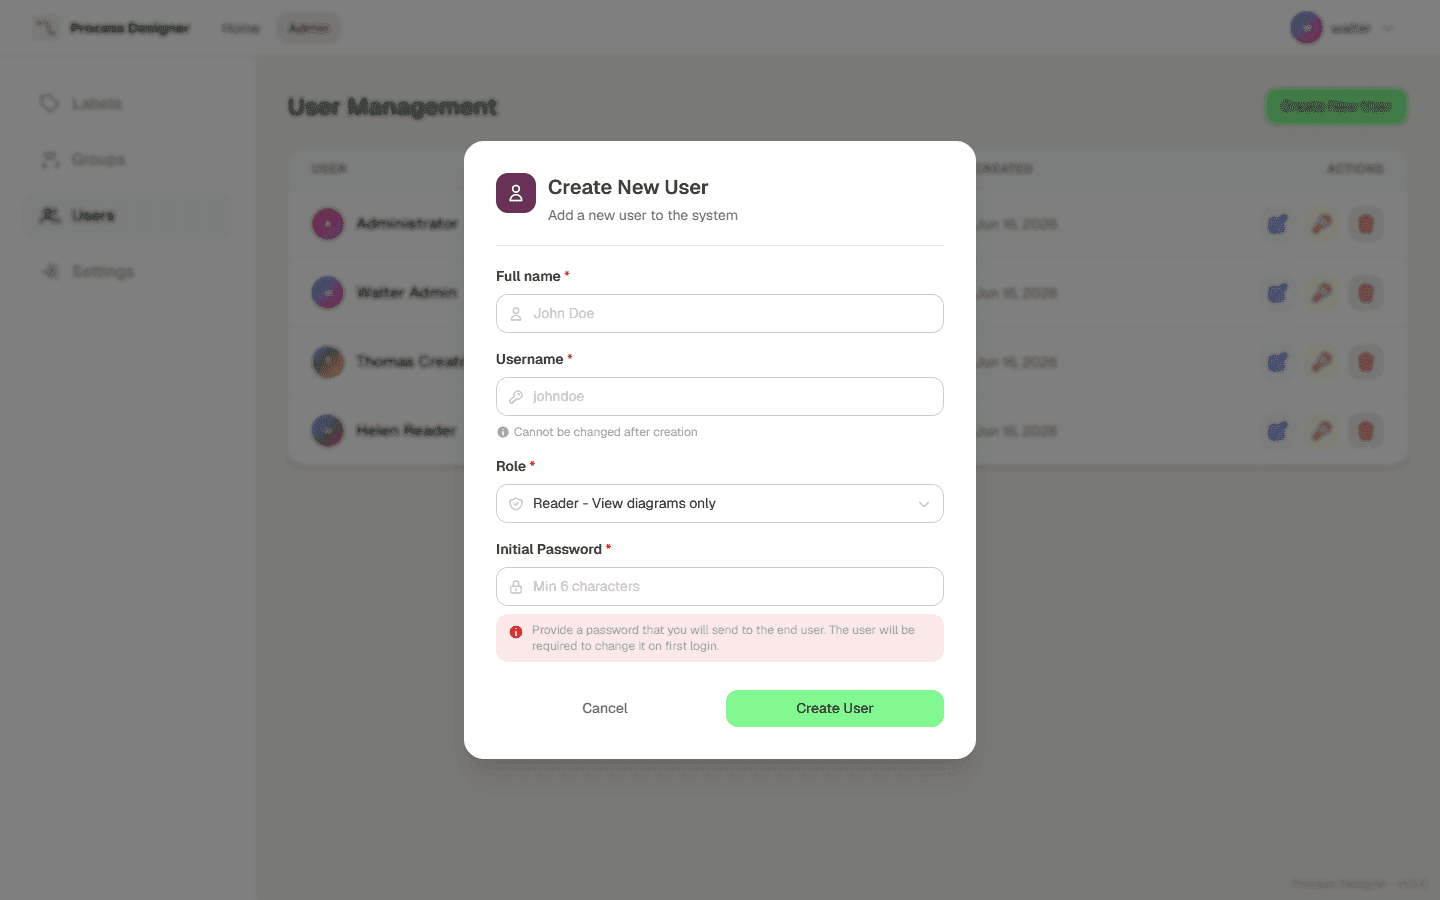
Enter the Full name, the name shown throughout the interface.
-
Enter a Username. It is the login identifier: it is stored in lower case and must be unique, whatever the case. It cannot be changed after the account is created.
-
Select a Role:
Reader,Creator, orAdmin. The dialog proposesReaderby default. -
Set an Initial Password. It is required, and the rule is shown under the field: "Password must be at least 6 characters."
-
Select Create User.
|
Share the initial password with the user through a secure channel. The user is required to change it the first time they sign in. |
Update a user
Select Edit user on a user’s row. You can change the Full name and the Role, then select Save Changes. The Username is read-only. To give a user a new password, use Reset password (described below).
Last-admin protection
The system must always have at least one Admin. If you try to change the role of the only remaining Admin, or to delete that account, the change is refused with the message "This is the last admin user. Promote another user to Admin first." Promote another user to Admin, then try again.
Reset a password
-
Select Reset password on the user’s row.
-
In the Reset Password dialog, type the New Password. It must be at least 6 characters long. There is no generated password: you choose it, and pass it on to the user.
-
Select Reset Password.
The user is required to change this password the next time they sign in.
|
A reset does not sign the user out. A session the user already has open stays valid, with the user’s previous rights, until it ends after 30 minutes of inactivity by default. Any activity in the application, including working in an open editor, keeps that session active. |
Delete a user
-
Select Delete user on the user’s row.
-
In the Delete User dialog, select Delete User to confirm. The deletion cannot be undone.
You cannot delete the last Admin (see Last-admin protection).
Known limitation: users who created diagrams
Deleting a user who created diagrams fails. The deletion is refused with the message "User has n diagram(s). Provide targetUserId query parameter for reassignment.", and the user is kept. The admin panel offers no way to transfer those diagrams to another user.
To stop such a user from signing in, reset their password (see Reset a password) and change their role to Reader. This does not end a session the user already has open: that session keeps the user’s previous rights until it ends, after 30 minutes of inactivity by default. With Bonita authentication (AUTH_MODE=bonita), disable the account in Bonita instead.
This is a stopgap, not a way to revoke access: it does not remove the account, and it does not act on an open session.
Allow users to register themselves
You can let people create their own accounts from the login page instead of creating each one manually.
-
Enable Allow User Self-Registration in Application settings.
-
Choose the Default Role for New Users — either
ReaderorCreator. TheAdminrole can never be granted through self-registration.
When self-registration is enabled, a Create account link appears on the login page. A self-registered username must be 3 to 20 characters long and may contain only letters without accents, digits and underscores. A user who registers chooses their own password, so they are not forced to change it on first login. When self-registration is disabled, the link is hidden and only an Admin can create accounts.
|
For a controlled environment, keep self-registration disabled and create accounts yourself, or set the default role to |
What users can change themselves
Any signed-in user can open their own profile to update personal details, regardless of role:
-
Display name — how their name appears in the interface, including in collaboration presence and comments.
-
Password — change it at any time by providing the current password and a new one.
Users cannot change their own username or role. To change a role, an Admin must edit the account.
For the editing experience and real-time presence where the display name appears, see Collaborate in real time.